Saturday, January 9, 2010

Only a few selected artists will be honored to realize dreams of beauty

A few more articles from the archives. First up is from the January 1952 issue of the American Magazine. The interesting thing is that Mrs. Spencer – like Mrs. West and Mrs. Garren would later do – seems to have come up with the idea independently. I have no reason to believe that all of these ladies did not do just that; the craft doesn’t appear to have been very wide spread until the 70s. There may have been something about it that appealed to the collective aesthetic sense of the era (and maybe post-depression frugality). This was one of the few articles I found from the 50s.

EGG ART


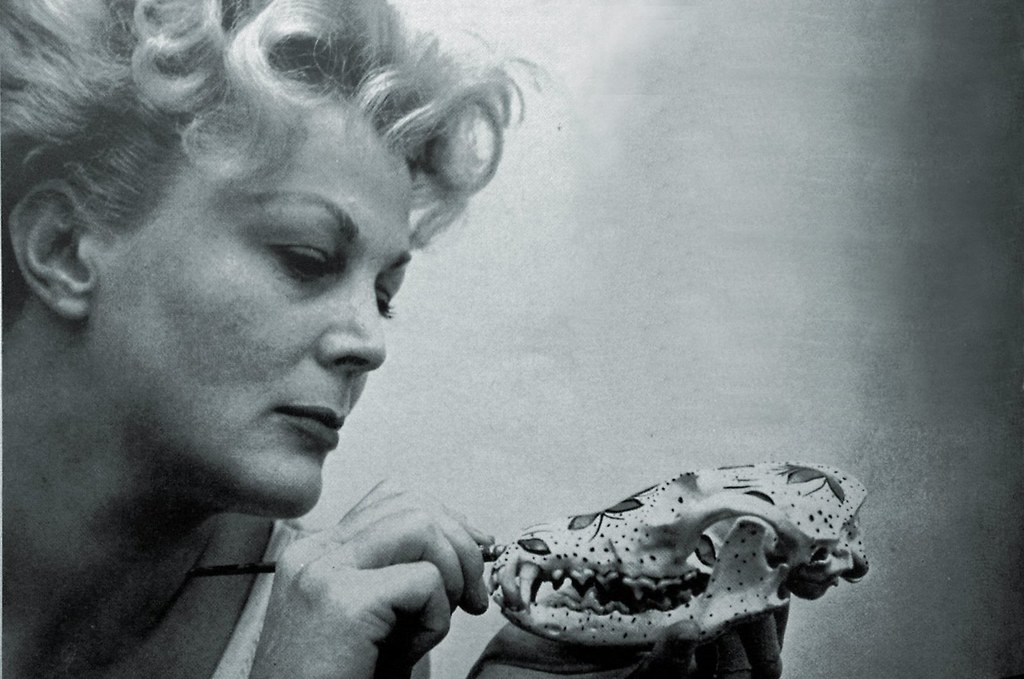
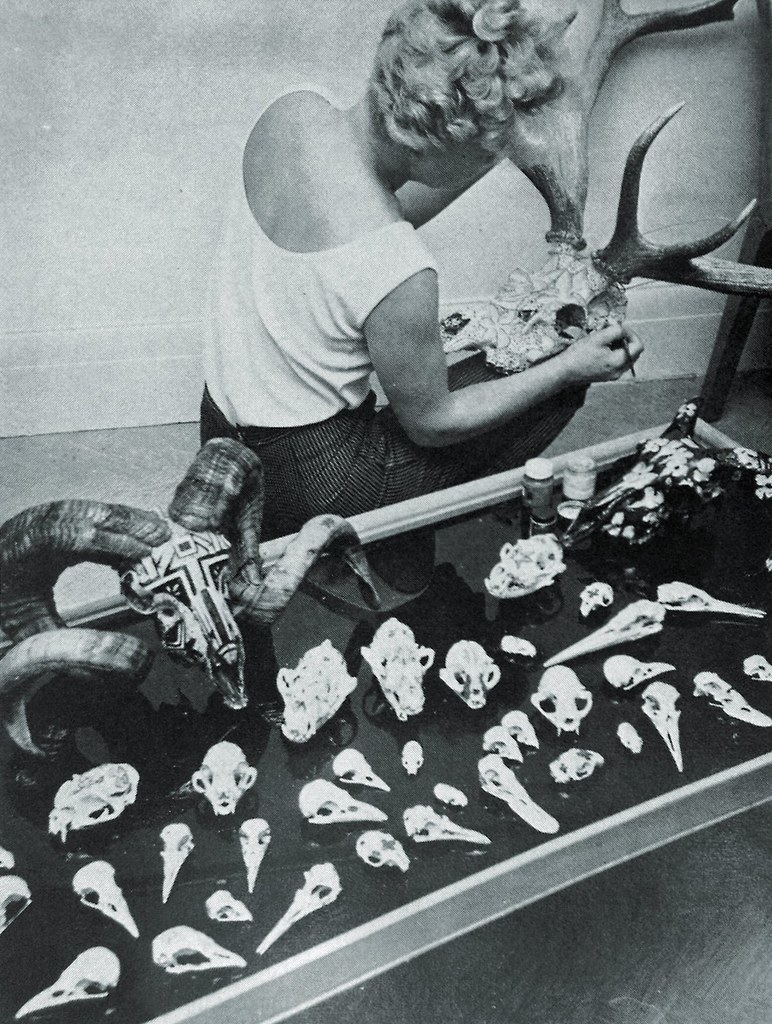
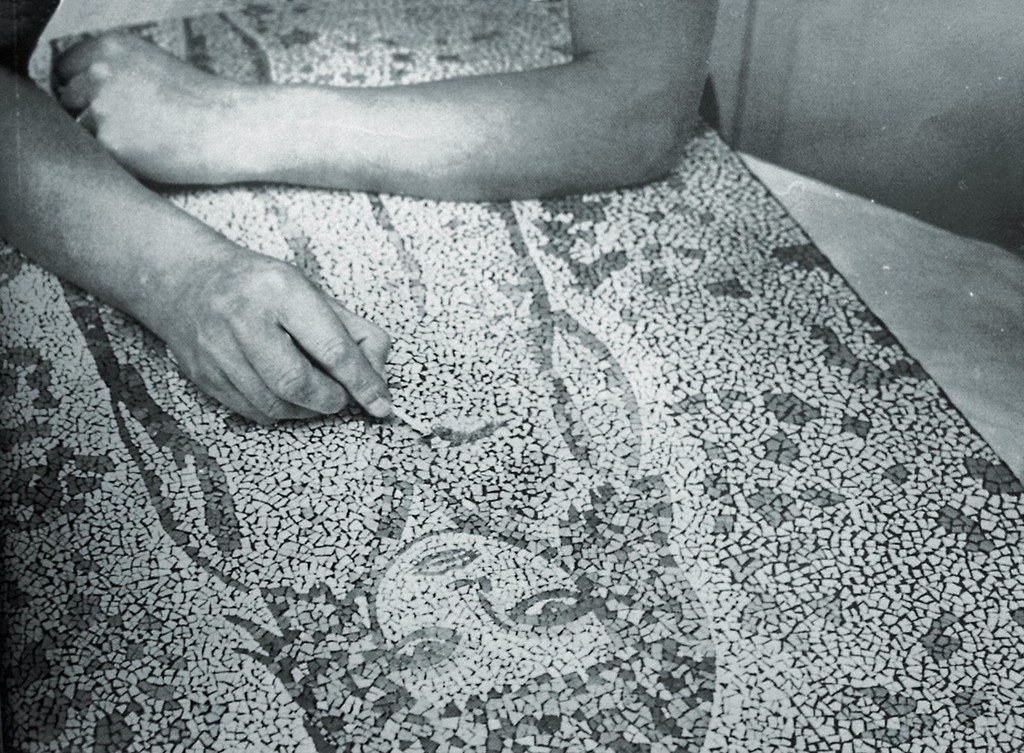
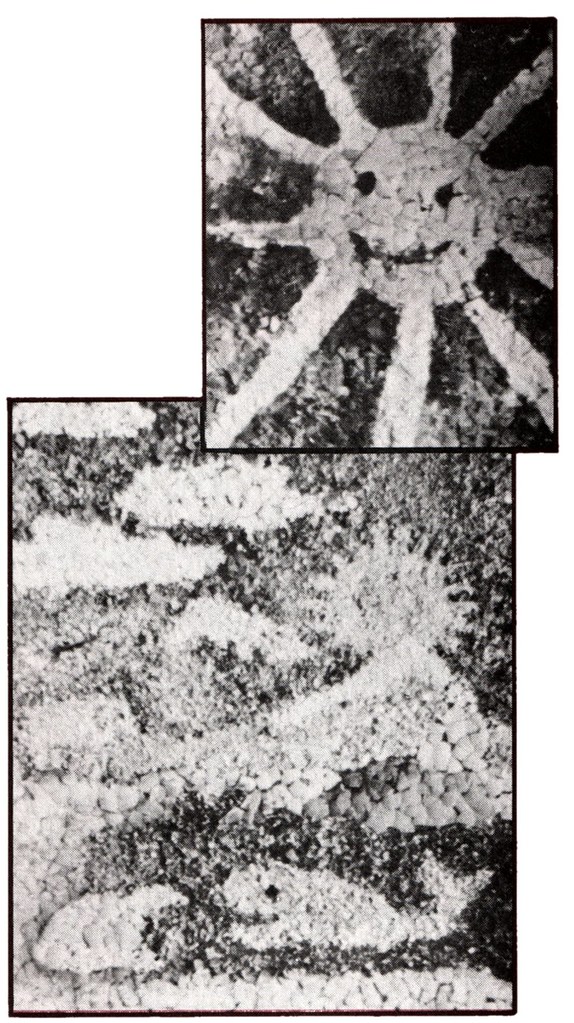
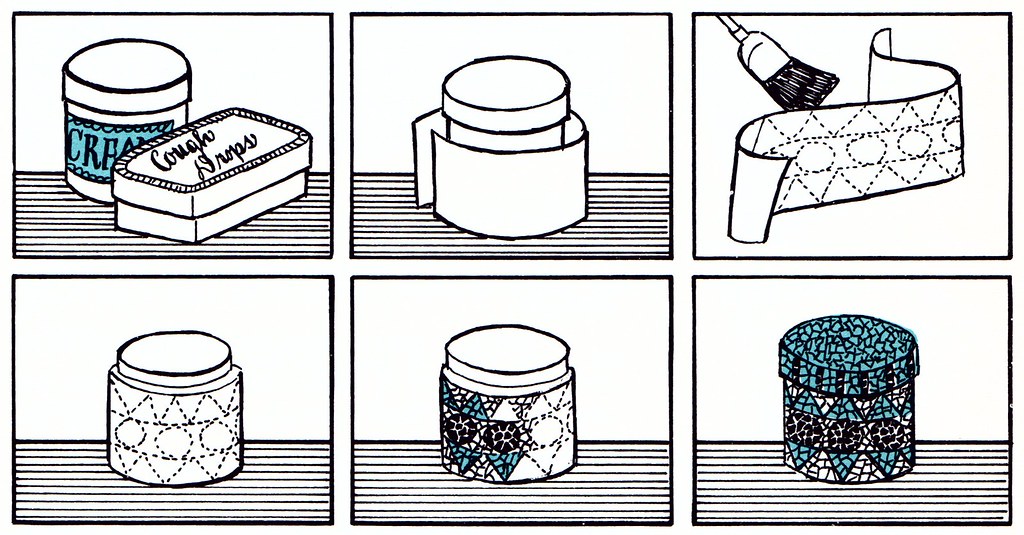
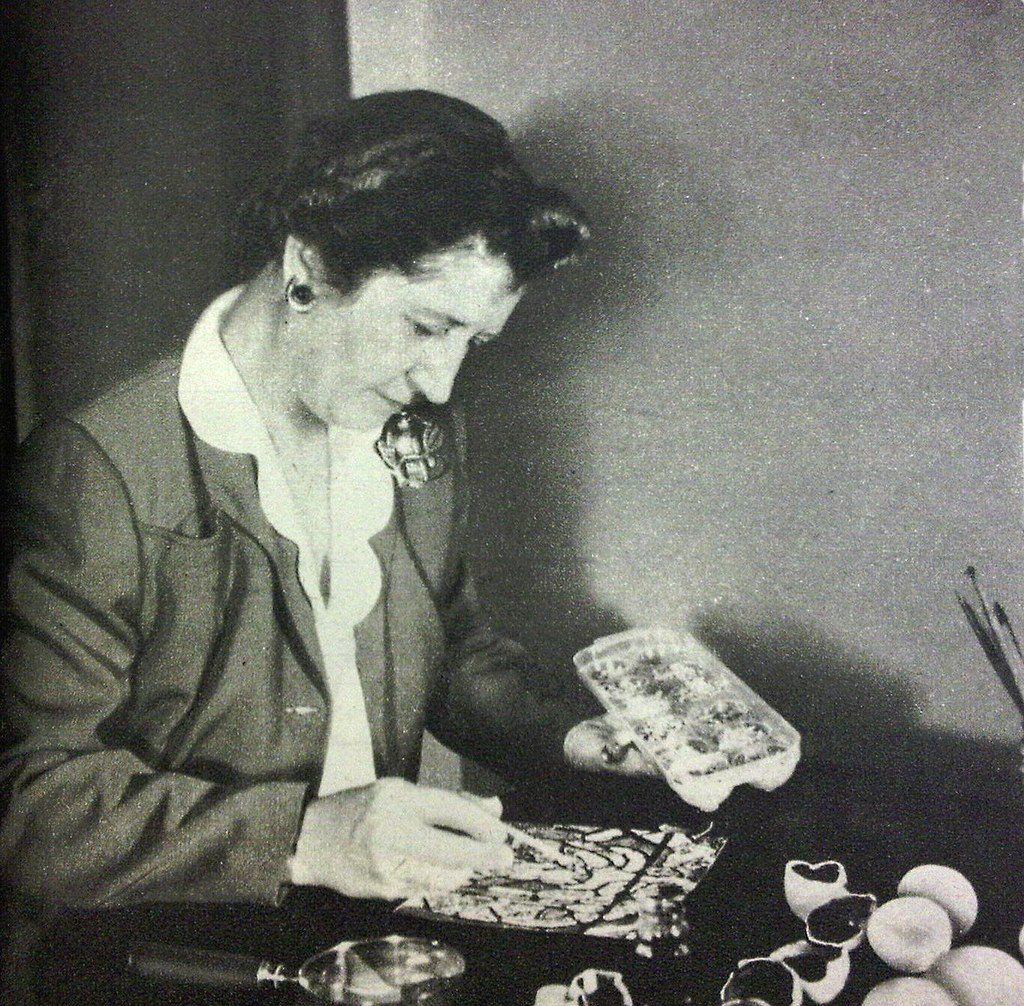
HELEN SPENCER, physical education teacher, of Des Moines, Iowa, has come along with an entirely new use for the lowly eggshell. She saves the shells from the trash can and uses them to create colorful mosaics and a new form of art. She takes ordinary white leghorn shells, adds paint and glue, and comes up with pictures that might well be found in your favorite church window. Some of Miss Spencer's shell bits are no larger than the tip of a pencil. In many of her pictures there are 350 pieces of shell to the square inch, and one picture takes from 160 to 170 hours of work. Most of her subjects are religious scenes or landscapes. She came upon her unique type of art by accident. One Christmas, she was decorating some perfume bottles for gifts. She decided to try eggshells to get a certain effect in a flower design. In doing so, she noticed the similarity to mosaics, and her new hobby was born. Although she has had little art training, her work has been widely acclaimed.

From the January 1965 issue of Design:

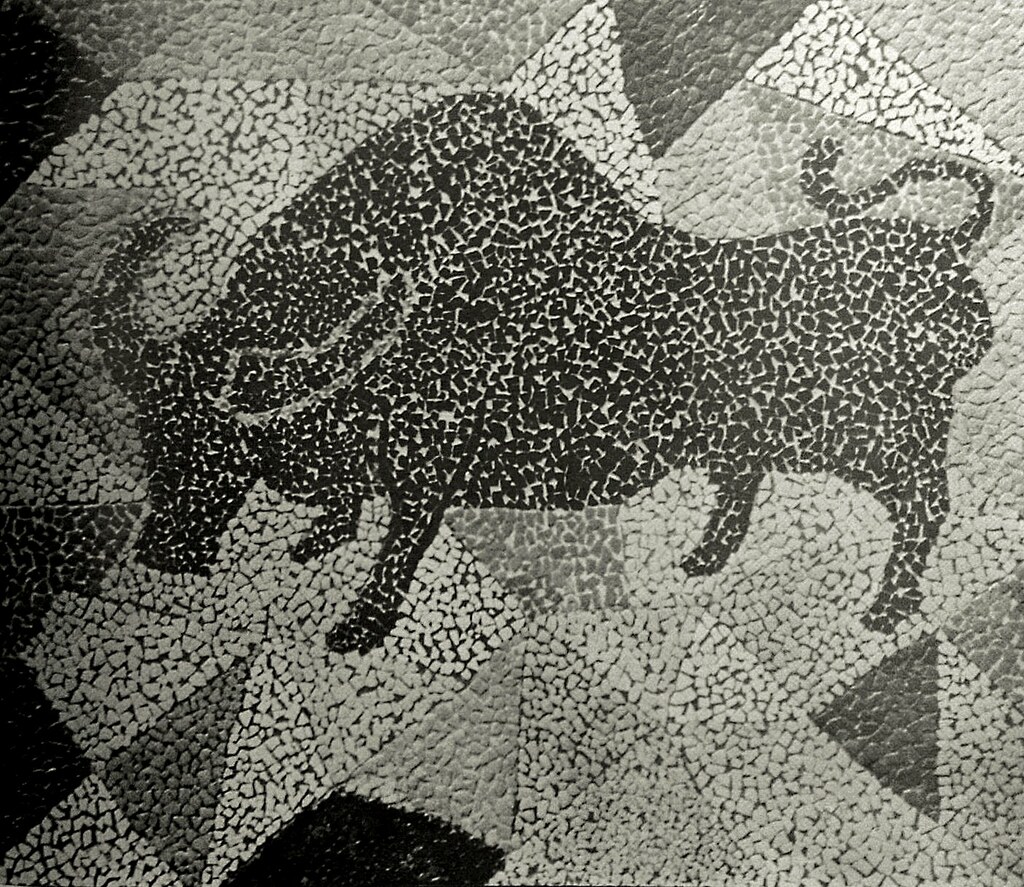
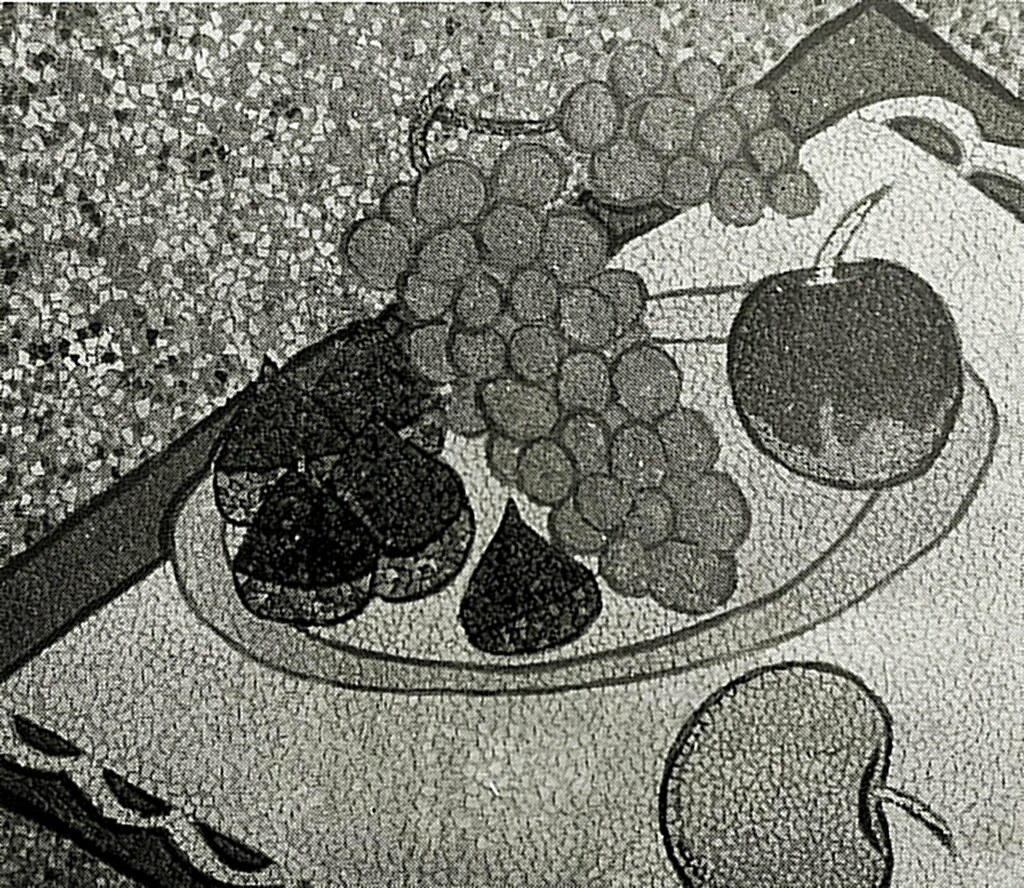
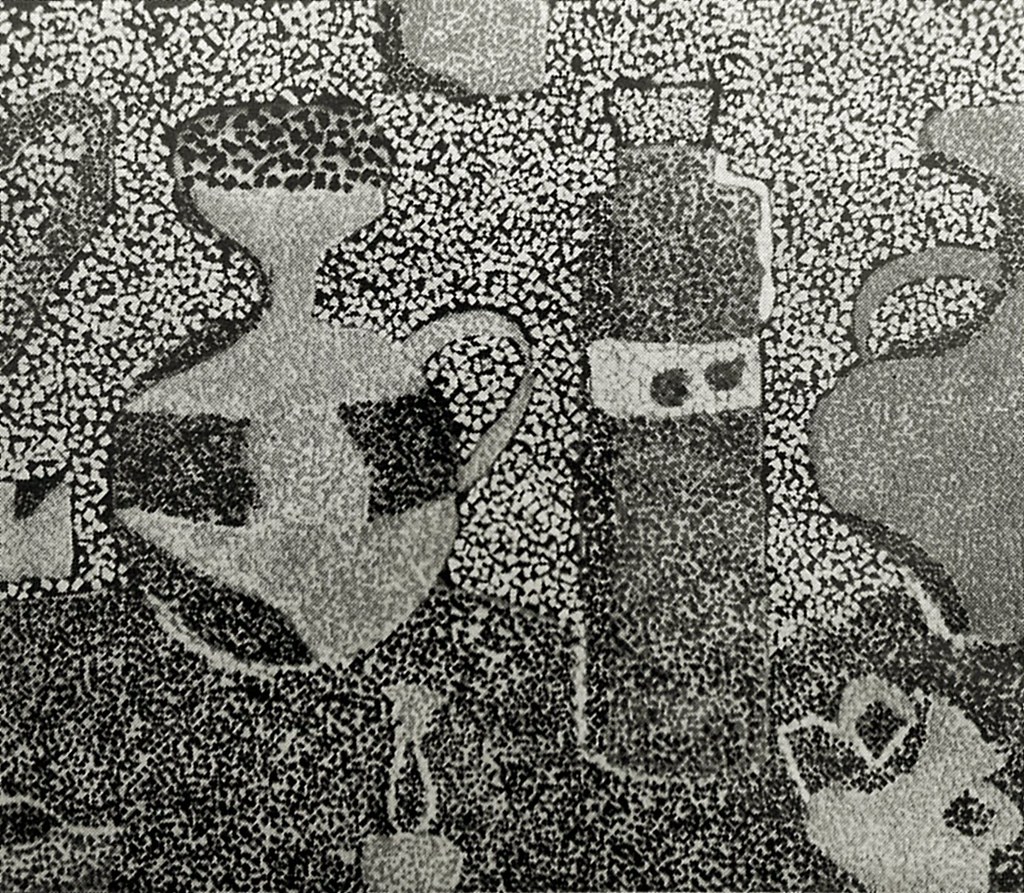
MOSAICS with EGGSHELLS
By Takaaki Sasano
Art instructor, University Junior High School, Hokkaido, Japan.

Only a few selected artists will be honored to realize dreams of beauty through mosaic works to be found, for example, on the walls of a monastery. Some of your children might in the future be asked to work on the gorgeous walls of a modern hotel lobby or a convention hall with tile or glass mosaic works. Here is, however, what you and your children can do right now, right at your home or school, with what you already have.

Instead of marbles or tiles, you use eggshells that you daily throw away into the kitchen garbage can. And any piece of plywood will take the place of a huge hotel lobby wall. It will be a most exciting half-day process of satisfying your sense of beauty and creativity. Then, your work will decorate the wall of your room or it will be an ever- welcome gift of your own to your relatives or friends.

Before you start working on your project, you need the following materials :
a. Eggshells (20 to 30, if you use a 10" x 15" board)
b. Water color (or easel paint)
c. A piece of plywood (or any similar board)
d. Adhesive
e. A pincette (or a stick with a needle on one end of it)

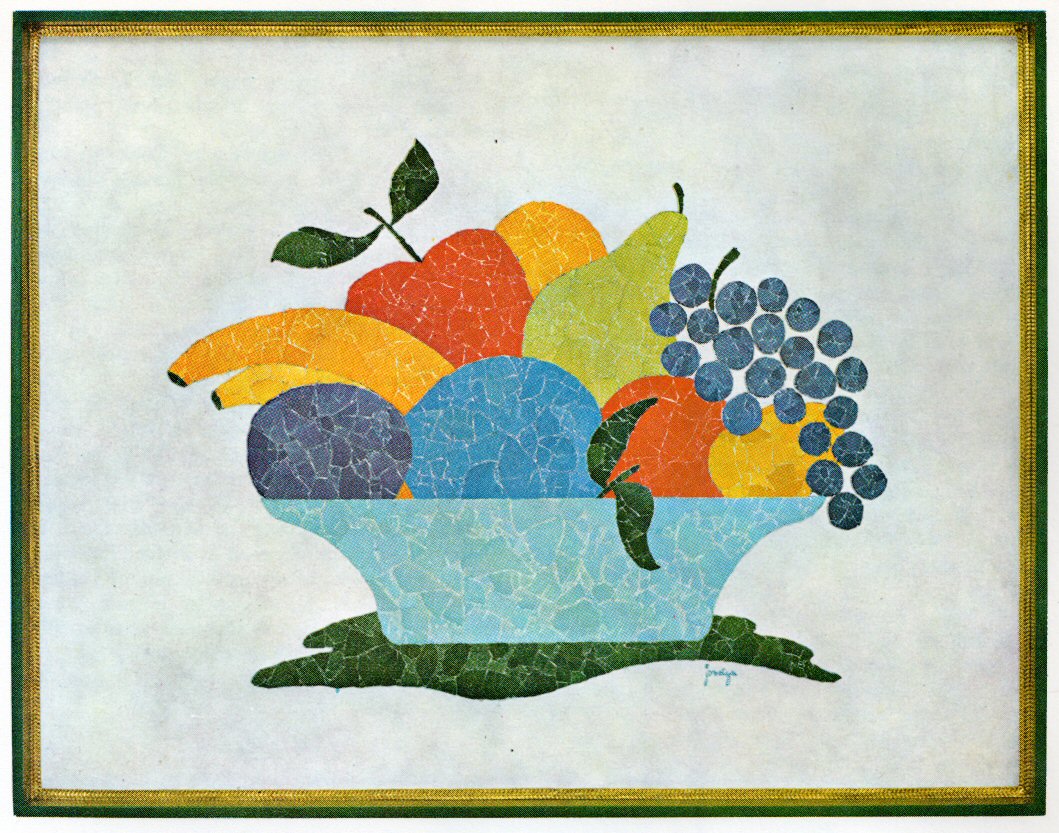
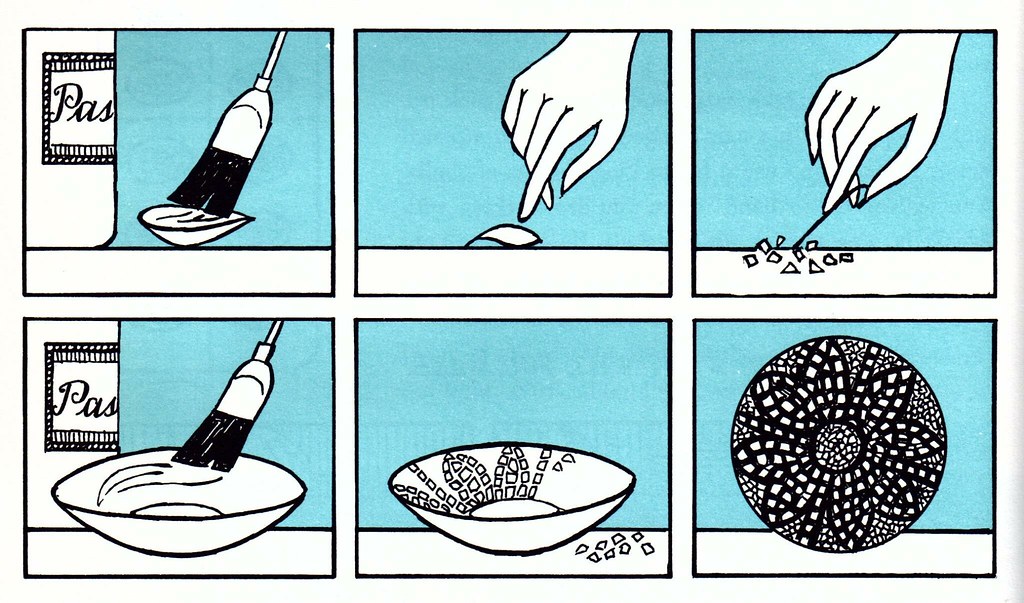
The following is a suggested process of how you will en¬joy making eggshell mosaic works :
1. Wash and dry the eggshells.
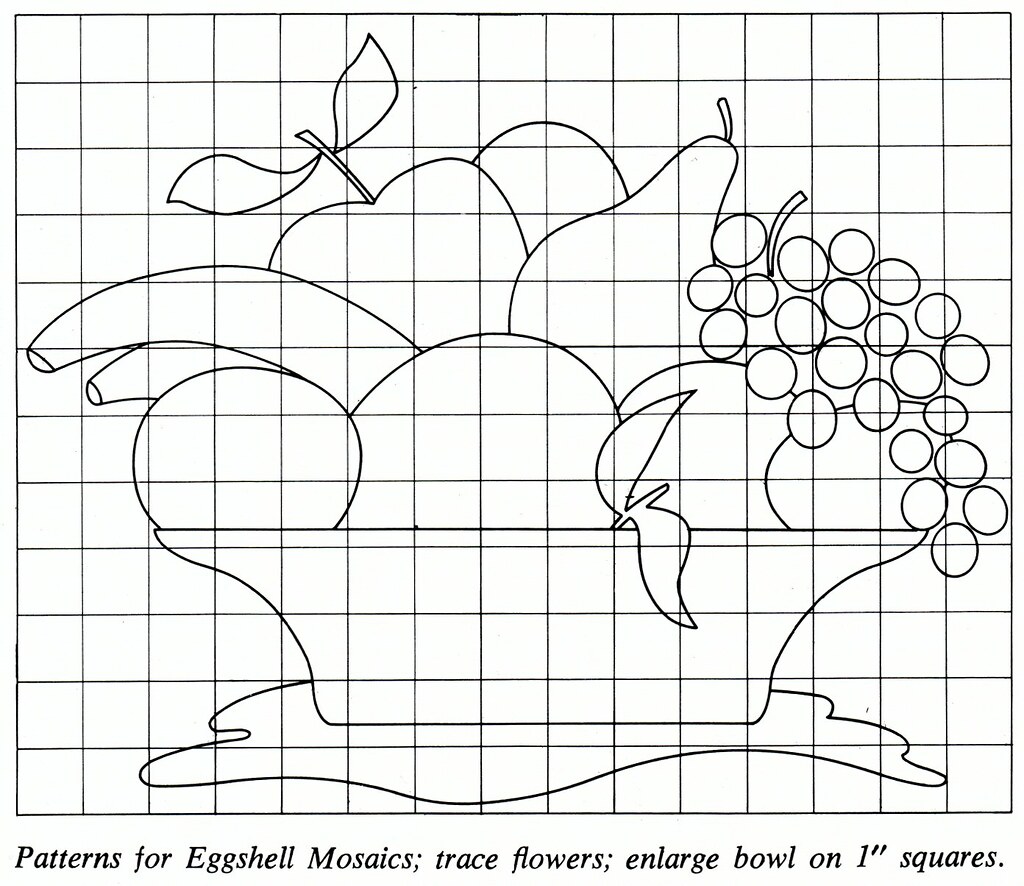
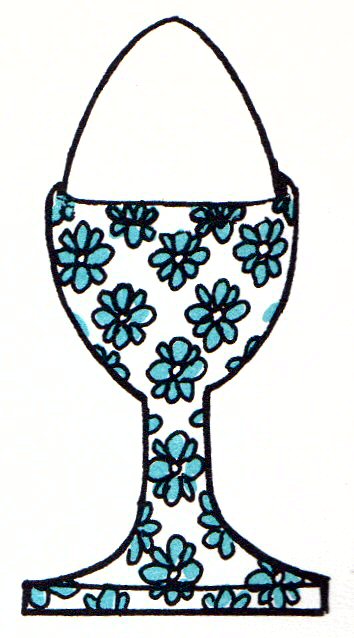
2. Draw your own design on the plywood. Pre-planning is most important here since mosaic is in a sense subject to the heaviest artistic restrictions.
3. Paint your design with complementary colors so that the colored eggshell particles might achieve later the most desirable color effect.
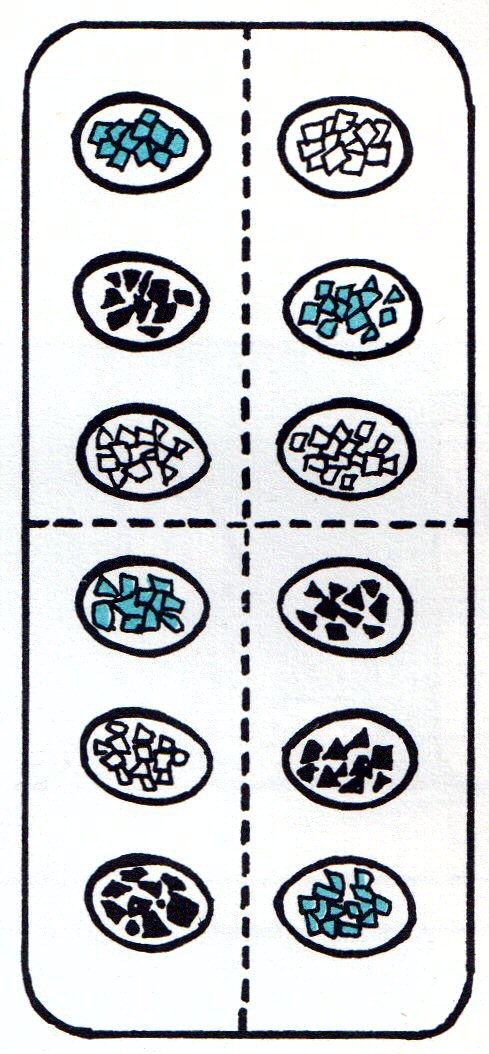
4. Color the eggshells as desired, and then dry them.
5. Crack the eggshells to various sizes desired.
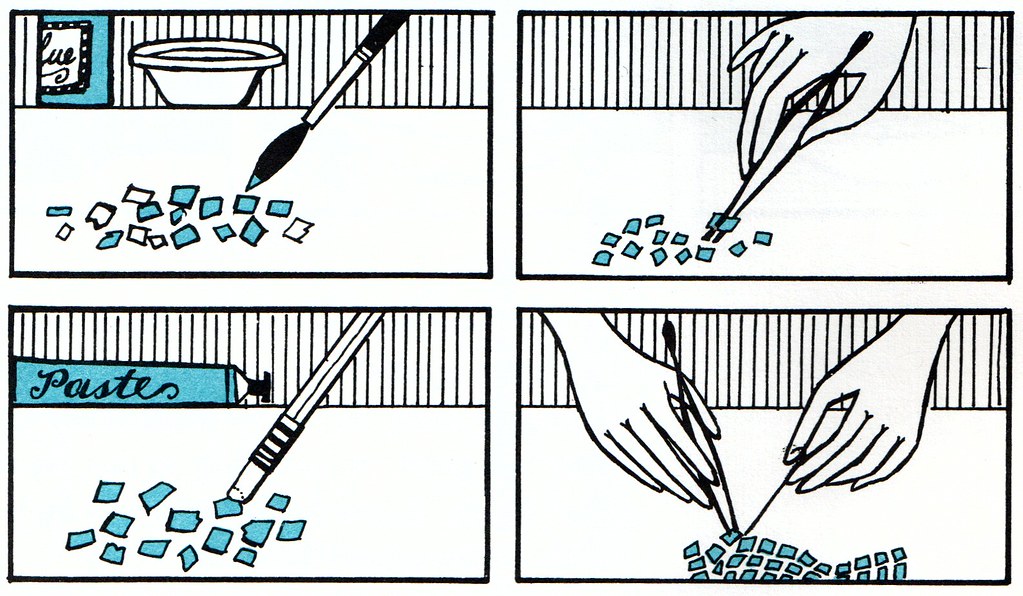
6. Place proper adhesive on the board.
7. Finally mount the eggshell particles carefully on your desig,. using a pincette or a similar tool.
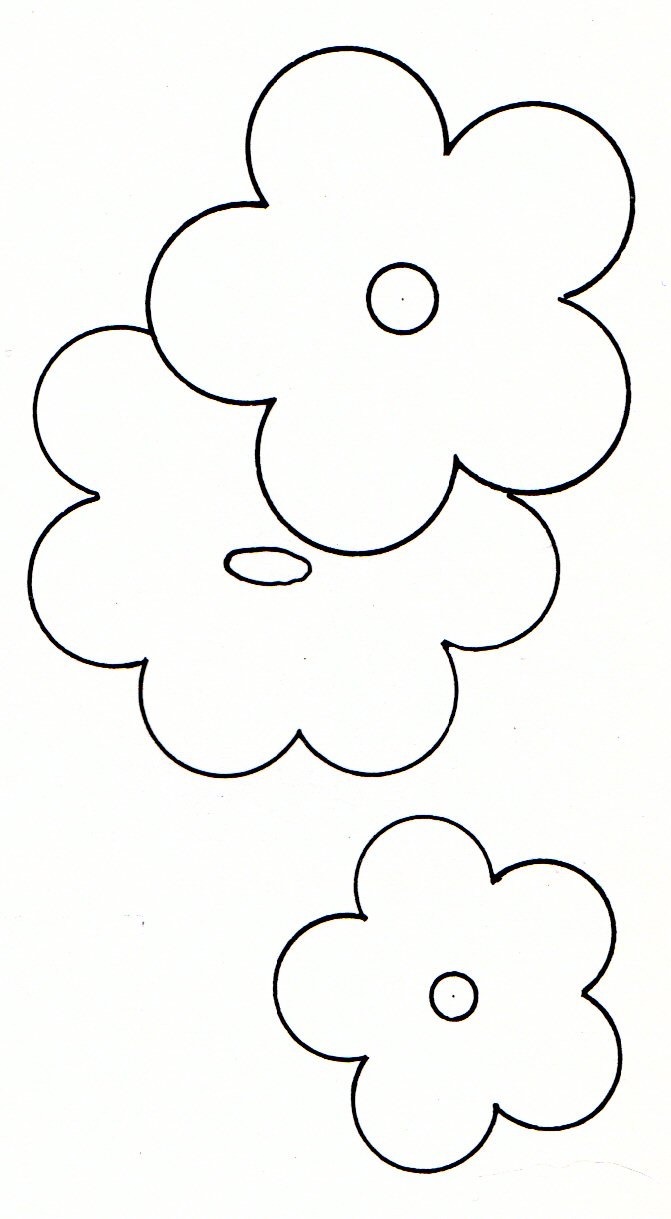
8. To make your work last longer, it is recommended to lacquer over all the face of it.


Tuesday, January 5, 2010

Dye testing part 1

Over the holidays I started experimenting with dyes. Combinations of the following were tested:


1. Type of dye
2. Temperature of the dye (hot or cold)
3. Whether the egg was raw or had been boiled

Dyes to test are food coloring, commercial Easter egg dye, Ukrainian Easter egg (pysanky) dye, RIT and Tintex clothing dyes. I started with the first three.

I wanted to test raw as well as boiled eggs because I assumed boiling would have an effect on at least the cuticle covering the shell. In the spirit of the proceedings, I used the instructions provided on the PAAS website for hard cooking eggs:

How to prepare the perfect hard-cooked egg


• Place eggs in single layer in saucepan. Add water to at least 1” above eggs.
• Cover. Quickly bring just to boiling. Turn off heat.
• If necessary, remove pan from burner to prevent further boiling. Let eggs stand, covered, in the hot water for 15 minutes for large eggs (12 minutes for medium eggs, 18 for extra large eggs).
• Immediately run cold water over eggs or place them in ice water until completely cooled.

Tips for preparing hard-cooked eggs:

• Only cook one layer of eggs at a time. Rapidly boiling water causes the eggs to bump against one another, which is more likely to cause cracking.
• To avoid cracking as well as the harmless, greenish ring around hard-cooked yolks, avoid over-cooking. Also, cool the eggs quickly after cooking by running cold water over them or placing them in ice water until completely cooled.
• Once eggs have cooled, refrigerate them in their shells until use.
• Hard-cooked eggs in the shell can be refrigerated up to one week. Hard-cooked eggs out of the shell should be used immediately.

They turned out very nice, so I prepared a delicious egg salad.

Food coloring

First up was food coloring. I used McCormick, mainly because it’s the easiest to find, but also because I like the little bottles. And there are instructions for dyeing eggs right on the box!
Mix ½ cup boiling water, 1 tsp. vinegar and 10 to 20 drops Food Color in a cup to achieve desired color or use the chart above. Repeat for each color. Dip hard-cooked eggs into dye 5 minutes or longer.

Red                                20
Yellow                            20
Green                             20
Blue                               20
Pretty Purple       5 Red + 15 Blue
Orange Sunset  17 Yellow + 3 Red
Teal                   5 Blue + 15 Green
Mint Green      14 Green + 6 Yellow
Dusty Rose          14 Red + 6 Blue

I mixed basic red and blue because a) I had red and blue of each dye type and b) I plan on testing sun fading later, and red tends to be a color that fades in sunlight. The results for red are below. From top left to bottom right, a boiled shell in cold dye; a raw shell in cold dye; a boiled shell in hot dye; a raw shell in hot dye. The raw shell in hot dye is a little deeper, but not incredibly. The difference may be because the dye was hot, but it could be just as easily attributed to chemical or structural differences in the shells.


Pretty much the same results with blue – not much difference among the samples. The boiled shell in cold water was not quite as deep. Over all the food dye did a good job – a nice range of tones and colors, keeping the texture of the eggshell. Because of the transparency of the dyes, different shell colors will produce different results – brown eggs with red or yellow dyes can result in a nice range of brown tones.

Easter egg dye

I managed to find some off-season Paas Classic Easter Egg Dye. The Paas company has been making egg dye for over 100 years. Basically, it’s food dye compressed into a tablet. Mix it with vinegar and water and you’re ready to plunk the eggs in. The dyes are mixed, and the colors are not readily apparent based on the appearance of the tablets.

The red and blue shells on the right (below) are from raw eggs. This dye is intended for boiled eggs, but the color is definitely richer on the raw shells.


Pysanky dye

Pysanky dye – dye used for Ukrainian Easter eggs – is a more concentrated and definitely not food grade dye. It comes in little foil pouches packed in little paper envelopes. It is very concentrated and will stain (see my blue fingers, bottom).


In the pictures below, from left to right: food dye, Pass, and pysanky. The pysanky dye is definitely deeper, and will get a little deeper with additional soaking (additional time isn’t as effective with the other dyes). Also black pysanky dye is available - not so with the other dyes – they just aren’t rich enough to produce a deep black.


I originally intended to find out which of these dyes work better, but, looking at these samples, the variety of color and tones is much more interesting to me. I’ll probably end up using a little of each.


Still to test – RIT and Tintex dyes, and a simple fading test.


Monday, January 4, 2010

The Avian Egg

I tracked down a copy of The Avian Egg by Alexis L. Romanoff and Anastasia Romanoff. Alexis Romanoff was a professor of embryology at Cornell and spent much of his career studying eggs. The book is very thorough and still a standard reference despite having been published in 1949. Eggshells (and eggs for that matter) are much more complicated than I imagined.


As mentioned before, there are two membranes between the albumen (white) and the shell. Now I know their names: the inner (egg) membrane, membrane putaminis (putamen is Latin for pod or husk), and the outer (shell) membrane, the membrane testae (testa is Latin for shell).

The outer surface of the inner membrane is firmly cemented to the inside of the outer membrane, except in a small area, usually at the blunt end of the egg.

The fibers of the outer surface of the shell membrane are so firmly embedded in the inner surface of the shell that it is difficult to detach the membrane without tearing it.
As for the shell itself:

It is composed of two widely different materials: an organic matrix, or framework, of delicate, interwoven fibers, and an interstitial substance composed of a mixture of inorganic salts. The proportions of these constituents vary in the eggshells of different species of birds. In the shell of the hen’s egg, there is roughly one part of matrix to fifty parts of mineral matter. The organic matrix is a collagen-like protein; the minerals, mainly carbonates and phosphates of calcium and magnesium. Of the latter substance, calcium carbonate is by far the most plentiful. In mineral composition, the eggshell is strikingly similar to limestone.
FIG. 98. Histological structure of the shell of the hen's egg.
A, radial section through the shell; magnified about 100 times (after von Nathusius, 1882b). B, tangential section through the mammillary layer of the shell, viewed from the outer surface; magnified about 100 times (after Stewart, 1935). C, radial section through eggshell after decalcification; magnified about 200 times (after Almquist, 1933). D, tangential section through the organic matrix material of the decalcified shell, cutting across a pore; magnified about 200 times (after Almquist, 1933). E, a portion of the inner surface of the shell after removal of the organic material by ashing; magnified about 100 times (after Ferdinandoff, 1931, p. 27).

The numbers indicate: 1, cuticle; 2, spongy layer; 3, mammillary layer; 4, shell membrane; 5, mammilla (mammillary knob); 6, protein matrix material forming the core of the mammilla; 7, protein matrix of shell; 8, pore in the decalcified eggshell; 9, space in a mammilla remaining after the organic core has been removed by burning.

The shell has two main layers – the mammillary and the spongy layers. The mammillary layer is the smaller, and is partially embedded in the outer surface of the shell membrane. For most birds, the spongy layer is the larger part of the shell. The whole thing is covered with pores for respiration. Firmly cemented to the outside of the shell is the cuticle, a very thin layer chemically similar to the membranes.

And as for the colors:
The colors of birds' eggshells are due to two major pigments, red-brown and blue-green, which were first identified with the bile pigments — the brown with bilirubin, and the green with biliverdin (Wicke, 1858). The shell pigments are now considered to be more closely related to the hemoglobin of the blood than are the bile pigments.

The red-brown pigment of the eggshell has been named oöporphyrin (Fischer and Kögl, 1923, 1924; Fischer and Müller, 1925; Bierry and Gouzon, 1939). This pigment may easily be converted into hematoporphyrin, which shows a red luminescence in ultraviolet light, of wave length of 3660 angstrom units, generated by a quartz-mercury lamp (Hulsebosch, 1927). Hematoporphyrin is probably related t hematin, which is a decomposition product of the hemoglobin of the blood.

The brown eggshells of the domestic fowl are rich in oöporphyrin. According to Voelker (1940), oöporphyrin is present in the shell of whit eggs (at least those of the chicken, duck, goose, pigeon, and owl) when they are laid, but it is quickly destroyed by light. Oöporphyrin was also found in the eggshells of many other species, including a number of passerine birds.

The blue-green pigment of some highly colored eggshells was named oöcyan by Sorby (1875). The chemical properties of this pigment indicate that it is a substance containing three pyrrole rings (Lemberg, 1931). According to Tixier (1945), the green pigment of the emu egg is the methyl ester of biliverdin IXa.
Now you know. How the colors are distributed (evenly across the surface, in spots or splotches) depends on where in the shell formation process the egg is when the pigments are deposited.

Being a thorough book, there is also a section on artistic uses of eggs and eggshells. The author includes the following paragraph and illustration:

Eggshell Mosaics.
The production of mosaics, by inlaying small pieces of glass, tile, enamel, or a variety of other substances, is an ancient craft that has frequently reached a high degree of artistry. It is also practiced as a hobby. Among the materials that have been used for this purpose is colored eggshell, which has been found adaptable for making many novel designs (Fig. 422). The shells are broken into pieces from 1/8 to ¼ inch in diameter, dyed, and glued to a base in the desired arrangement.

Sunday, January 3, 2010

Works of Art From Skulls and Eggshells

I found a real gem today – artist Verna Hitchcock has been working in eggshell mosaics for decades, using the natural colors of eggs for many of her pieces. This article is from the March-April 1967 issue of Design.


Works of Art From Skulls and Eggshells
by Frank Martin

South African artist Verna Hitchcock decided that she would like to make mosaic pictures from broken eggshells. "I was impressed with the natural colorings, which are impossible to reproduce with paints," she explained. "I remove the inner skin and stick then to the hoard with a special glue which bonds the shell to the hoard. I spend many hours in the country looking for discarded shells, and also receive regular supplies of shells from gamekeepers, etc., who are able to find the more rare eggshells."


Interest was added and a new project undertaken when Miss Hitchcock, traveling the countryside in search of shells, began finding several skulls of animals (mainly rabbits, foxes, and birds). The artist immediately began to consider the possibility of creating beautiful works of art from these gruesome relics of death in the wild. After first cleaning the skull, she gave it a coat of light colored gloss paint. (This tends to create a porcelain effect and overcome the stark cruelty of the bone.) Next, Miss Hitchcock worked on the skull with enamel paints, decorating it with brightly colored designs.


Since her initial discovery, Miss Hitchcock has collected many skulls ranging from sheep and deer to swans and tiny ferrets. They uniquely adorn the mantel of her home in Hampstead, London.


An admirer who had heard of her work recently sent Miss Hitchcock two giant elephant skulls as a gift, hoping that she can turn them into objects of beauty. The artist, contemplating her new project, says, "I will first have to fill in the cracks, and then give them a good scrubbing before starting to paint. However, they certainly present an interesting and different challenge!"


Before this article, Ms. Hitchcock was the subject of this 1964 British Pathe short. If anyone recognizes what brand of glue she is using, please let me know.

EGGSHELL ARTIST


Click image to watch video

In 2009 she displayed the bulk of her work at London’s Hellenic Center. This was supposedly the first public exhibition of her work, although the British Pathe film seems to indicate otherwise. The April edition of the Marylebone Journal included this article about Ms. Hitchcock and her work.

Marylebone Journal
April / May 2009, pp 30-31

EXHIBITION OF A LIFETIME
Verna Hitchcock

7 April – 5 May
(Closed 10–13 April, 17-19 April, 4 May)
Mon-Fri 10am-6pm
Sat-Sun 12pm-5pm
Private view 22 April, 6.30pm-8.30pm
Hellenic Centre
16-18 Paddington Street
020 7487 5060
helleniccentre.org

Verna Hitchcock has spent decades devoting her life to creating a large and highly distinctive body of art. But despite her obvious talent, none of her pieces have ever been shown in public. Now she has taken the extraordinary step of booking the Hellenic Centre’s impressive exhibition space for a whole month to put her life’s work on display.

The idea behind Verna Hitchcock’s amazingly detailed egg shell mosaics came very suddenly. “I found a whole load of magazines that somebody had thrown out,” she says. “In one of them there was a picture of an Etruscan woman. I was looking at this image and from nowhere I just thought, gosh that would look lovely in egg shells. I got so excited that I picked up the phone straight away and said to the chappie at the grocery store: ‘How many eggs have you got? Send me about three dozen, but make sure you mix up the colours; the whites and the browns.’ He thought I’d gone mad, but I said: ‘Just deliver them.’ And that’s where it started.”

Another time she found a company that made lightbulbs with bright colours baked onto the bulbs. They sent her huge black bags filled with old fused bulbs which she smashed up with a hammer and used to make wonderfully colourful mosaics. Recently she has been experimenting with pea shingles – small stones used for laying pathways – which she has used to create a striking portrait of a young protester in Trafalgar Square. Any material she finds – fabrics, wallpaper, copper piping – she’s sees as a potential medium for her pictures rather than as everyday rubbish.


Verna’s apartment is full to bursting with paintings and objects – large, framed pictures hanging on the wall or just stacked up in piles; glass bottles that she’s covered in plaster then varnished and painted; Japanese dolls that she’s housed in elaborate cases. She has boxes full of the most beautiful stones, found on beaches, which she has covered with shoe polish and buffed to a shine, and extraordinary fossils – huge ammonites and belemnites – uncovered on Whitby Bay. The whole place is an Aladdin’s cave of artist’s materials, works in progress and hundreds and hundreds of finished pieces.

Verna herself remains something of a mystery – she’ll talk happily about her work, but she gives away very little about her past. She was born and raised in South Africa, but has been in the UK for many years. “I ran away really,” she says. When she was young she was an athlete – a high promising sprinter – before discovering “boys and cigarettes”. That’s about all she’ll say. The only other clues come from some faded old photographs, letters and press cuttings mounted on a board in her apartment, including a hand-drawn cartoon sent to her by Alfred Hitchcock. She had read in a newspaper that the only thing the film director was afraid of was eggs, so she wrote to him about her mosaics and sent him some cuttings. He sent her back the cartoon and a note saying: “I am glad about my disinterest and your interest in eggs.”

Now, for the very first time, people other than visitors to Verna’s unusual little flat will have the opportunity to see the fruits of a lifetime of loving labour. Despite being hugely prolific and obviously talented, she has never previously had any desire to show her work in public. “Most artists create 20 pictures then hold an exhibition, then make another 20 and hold another exhibition. I never did that. I was happy, I just lived with them and they were mine. But then I thought, damn it, I need to hold an exhibition. I want other people to see my work.”

The result is a remarkable event being held at the Hellenic Centre throughout April, at which Verna will finally bring her life’s work blinking into the daylight. But it’s not like most private shows – Verna has never sold a piece of art, nor does she ever intend to. Her exhibition is meant as nothing more than a way of sharing her work with the outside world. It’s a brave, highly individual, charmingly eccentric act – a reflection, if ever there was one, of its creator.

The photos from the show, or at least thumbnails, are viewable here (click the arrows in the upper right part of the frame) and here. The pictures are small, but you can get an idea of how cool these are.

Tuesday, December 15, 2009

Transform your eggshells into a work of art: two more from the 70s


If 70s craft culture was a religion (and some may say it was), then the McCall’s Book of Handcrafts would be its sacred text. Between its cheerful yellow covers lurk nearly every classic craft project of the era – tie dye, batik, mushroom shaped candles, owl macramé (owls were a very popular subject), bottle art, paper flowers, and, of course, eggshell mosaics. The directions are simple and direct; there was, after all, a lot to fit into 219 pages. Unfortunately, the fruit bowl example is one of the least interesting designs in the book.


EGGSHELL MOSAICS

EQUIPMENT: Glass jars, various sizes. Tweezers. Metal spoon. Tracing paper. Carbon paper. Scissors. Pencil. Small pointed paintbrush.

MATERIALS: Eggshells. Liquid fabric dyes or food coloring (colors given under individual directions). Elmer's Glue-All. Clear acrylic enamel spray. For additional materials, see individual directions.

GENERAL DIRECTIONS: Save eggshells from cooking. Rinse them in water and remove thin membrane that may have adhered to interior. (Membrane pulls off easily.) Shells from four large eggs cover area about 6" x 11".

To Prepare Surfaces: Paint or paper item (see individual directions); dry thoroughly. Copy or enlarge designs, below, on tracing paper; transfer to surface by going over lines of design with carbon underneath.

To Dye Eggshells: Use a different jar for each color, pint or quart size depending on quantity of shells to be dyed. Mix dye with hot water according to directions on bottle, then immerse eggshells in dye-bath and stir with metal spoon until desired shade is reached. Rinse shells in cold water; set aside to dry. Note: Since eggshells range from white to brown, dye will cover them in varying shades, adding to the interest.

To Apply Eggshells: Break up eggshells into irregular pieces, varying from about 1 1/4" in diameter to bits the size of a pinhead. Apply larger pieces first. With small paintbrush, cover back of shell with film of glue; place in position with tweezers. Press shells firmly until they are flat and glue adheres; the pressure produces a crackled finish. For tiny pieces, just dip into glue and apply where needed to fill in small areas. When glue has dried thoroughly, spray with clear enamel.


TRAY: Additional Materials: Two paper trays, 10 1/4" x 5 1/4" (the kind used for packaging meat). Orange spray paint. Green and orange dyes. Four 3/4" felt disks.

To Make: For a sturdy tray, glue one tray inside the other; then wet edges thoroughly with water and apply glue between them, squeezing the two edges together until they adhere to each other. Place a weight on center of doubled tray to hold its shape while drying. When dry, spray with several coats of orange paint.

Using actual-size flower patterns above, trace flowers and transfer to tray. Glue on eggshells, making two orange flowers with dark green centers, two light green flowers with orange centers, a dark green flower with white center. Add a few dark green bits scattered over background. Fill background with various shades of undyed eggshells. Spray with clear enamel. Glue four felt disks to bottom corners of tray.


The ancient art of matching small pieces of stone, glass, etc., to form a mosaic design can be experienced with dyed eggshells! Pieces of colored shells are glued to a painted or papered surface. Note the vibrant marbelized effect in a bowl of fruit against white fiberboard, in the 16" x 20 1/2" picture above. Paper tray with natural eggshells and bright flowers becomes a snack server.

PICTURE: Additional Materials: White fiberboard, 16" x 201/2". Dyes: red, green, purple, yellow, blue. Lattice strips, 1" x 1/4": two 16" long, two 21-1/8" long. Small nails. Hammer. Dark green paint. Paintbrush. Gold braid, 2 1/4 yards.


To Make: Enlarge design for bowl of fruit above by copying on paper ruled in 1" squares; transfer design to fiberboard. Glue on eggshells, using following colors: red for apples, yellow for lemons and bananas, light green for pear, purple for plum and grapes, medium blue for eggplant, light blue for bowl, dark green for leaves, stems, shadow. When glue is dry, spray with clear enamel.

To Make Frame: Fit lattice strips closely around outside of fiberboard; nail together at corners; paint dark green. Run a line of glue around edges of fiberboard and place frame over it with frame extending to front as shadow box. To finish, glue gold braid along inner frame.


This article, from the 1979 Women’s Circle Crafts & Needlework Collection, includes a good tip where to find more eggshells...


Eggshell Mosaics
Transform your eggshells into a work of art

Next time you crack open an egg, don't throw out the eggshell. It is a valuable item which can be transformed into a work of art.

The shells of one dozen eggs can make an 8" by 10" mosaic. You will probably want to color them first. This can be accomplished by washing them thoroughly, then placing them in containers of water tinted with food coloring or clothing dye. After they reach the desired color, remove from the color bath and place on newspaper to dry.


Decide upon a design. If you can't think of one, a coloring book may provide good designs on many subjects. These can be traced onto a surface of cardboard, wood, matte board, or any sturdy backing.

There are two ways you can apply the eggshells to the board. First, spread white glue over the area to be covered with shells. Then, either crack them in your fist and sprinkle them on the glue or break them into large segments, place them on the board and press them in place.

Small areas are more easily covered with finely cracked shells. To do this, place shells in a cup, then smash them into tiny pieces with a fork. Sprinkle them in place or use tweezers to reach hard to get at spots.

You can apply the shells in one or more layers. Sprinkle or press them on as thick as you like, then pour thinned down white glue over all (a mix of flour and water also works as an adhesive).

Eggshell mosaics don't have to be made from predyed shells. Cover a board with white shells, then, paint your design over them. Use any type of paint - watercolors, acrylics, tempera, etc. Paint can also be used to touch up area or to add detail to predyed mosaics.

You don't have to eat 6 eggs every day for a month in order to get the shells for a large mosaic. Go to a nearby restaurant and ask them to save their eggshells for you. After one breakfast rush, they'll have enough shells for you to make a dozen mosaics!


Joanne Whitfield

Monday, December 14, 2009

Start saving eggshells today

It will be after the holidays before I dye any more eggs, so in the meantime I’ll post some of these articles that have been accumulating. The first one is from Creating Mosaics, by James E. Seidelman and Grace Mintonye, 1967. It’s a nice introduction to making mosaics for young people. Harriet Sherman’s illustrations are charming.


DO IT WITH EGGSHELLS

Start saving eggshells today. You will need dozens and dozens when you find out how much fun it is to make an eggshell mosaic.


Save the egg cartons, too. They have twelve little cups that can be used for storing the eggshells after they are colored and broken into little pieces.

Tint the eggshells different colors with Easter-egg dye. Make several shades of colors, some light, some dark. Break them into little pieces and keep the colors in separate containers. It's also good to separate the different sizes so that you can find them easily when you need them.

Eggshells break easily and are hard to pick up, so be prepared with a pair of tweezers. Or dip a pencil eraser in paste and use it for picking up bits of shells. You will need two hands when you are working with eggshells; one to pick up the shell, the other to hold it in place. Straighten out a paper clip to help you keep the shell in place.

READY? WHAT WILL YOU MAKE?


Find a piece of eggshell about the size of a quarter. Spread paste on the back, place it on a piece of paper, then press down with your finger and see it explode into little pieces. Take a paper clip and spread them around.

It's like a puzzle. As you pull them apart, you create a design different, unusual, and your very own.

Do an eggshell mosaic on the inside of a saucer or a plate. Spread glue over the saucer, then pick up each piece of eggshell and stick it in place.

When it's finished, cover the design with clear shellac.


Give your mosaic a Byzantine gold-leaf look. After the eggshells are glued in place, cover everything with gold paint. Wipe it off immediately with a soft rag, 4 but do it gently and carefully so that you don't destroy the design. A gold background will be left in all the little cracks around the shells.


MAKE GIFTS WITH EGGSHELLS

Jars and boxes come in many shapes. Look for empty cold-cream jars . . . pickle jars . . . small metal boxes . . . compacts that are ready to be thrown away because the mirror is broken.

Covered with an eggshell mosaic, any of these would make a handsome gift.

Cut a piece of lightweight paper to fit around the jar or box. Plan your design, then sketch it lightly on the paper. When it's finished, spread glue on the back of the paper and fasten it in place.


TRY—a pattern of stripes in different colors.
TRY—a solid color across the top of the lid with a design around the sides.

Spread glue over the design you sketched on the paper, then pick up the eggshell pieces, one at a time, and lightly press them in place.

Sunday, December 13, 2009

An egg is an egg is an egg...

After reading the 1957 American Home article, I started thinking about different colors of eggs that would have been available then, and how cool it would be to make a mosaic using only the original colors of the eggshells.

Most commercial egg layers are leghorns, and they lay white eggs. But there are a lot of small farms raising less common breeds, and their eggs are all sorts of colors – blue, green, red, brown – and a lot of these eggs are making their ways to farmers markets, co-ops, etc. These eggs are well worth looking for, because not only are they all sorts of interesting colors, they are often from organically raised, free-range chickens. With urban farming on the rise, I wouldn’t be surprised if there are actually more varieties of eggs available now than in 1957.

Check out Henderson's Handy-Dandy Chicken Chart for a good idea of what’s out there. Granted some of these are pretty rare breeds, but someone in your area may be raising Ameraucanas (blue, green, pink), Marans (chocolate brown), Rhode Islands (brown), or Silkies (cream). Make friends with these folks!
 
Also keep an eye out for other non-chicken eggs - guinea hen and turkey eggs are speckled, for example. Try an image search for a few of these ("Marans eggs", for example) - the variety is impressive.