Sunday, November 29, 2009

Some notes on eggshells

The eggshells I am using are common grocery store variety hen eggs. White is recommended because it is easier to predict how dyes will work with them. Don’t throw out your brown eggs, though – the nice reddish brown tones may be just what you need for a project, and they are good to have if you are using vegetable or food dyes (more about that later). And if you are lucky enough to know someone who raises chickens that produce blue or green eggs, you should ask them to save shells for you as well.

You will need a lot of shells. Get your friends to save them for you. Tell them to just give them a rinse, and that it doesn’t matter if they are in little pieces - they’re going to wind up that way anyway.

Keep in mind that eggshells may have a few Salmonella bacterium hitching a ride. Washing (and the upcoming vinegar bath) should take care of any that are lingering, but it is wise to take precautions – keep hands and workspace clean between working with unwashed eggshells.


Eggs are complicated things. The shell itself is mostly calcium carbonate, held in a matrix of proteins. Attached to the shell is the shell membrane, which is actually two layers separated at the blunt end by an air space. The membrane will need to be removed so that the shell itself can be glued directly on the mosaic support; otherwise, as the membrane dries and separates from the shell, the shell pieces may pop off. When the egg is freshly cracked, it is fairly easy to remove the membrane. However, it’s a little easier to wait.


UPDATE - I no longer recommend the vinegar pre-soak. Find out why here...


If people are saving shells for you, you’ll probably end up cleaning a bunch that have been sitting around for a while and have dried out. The membrane will be very brittle and almost impossible to remove. But don’t lose hope – there is a solution.
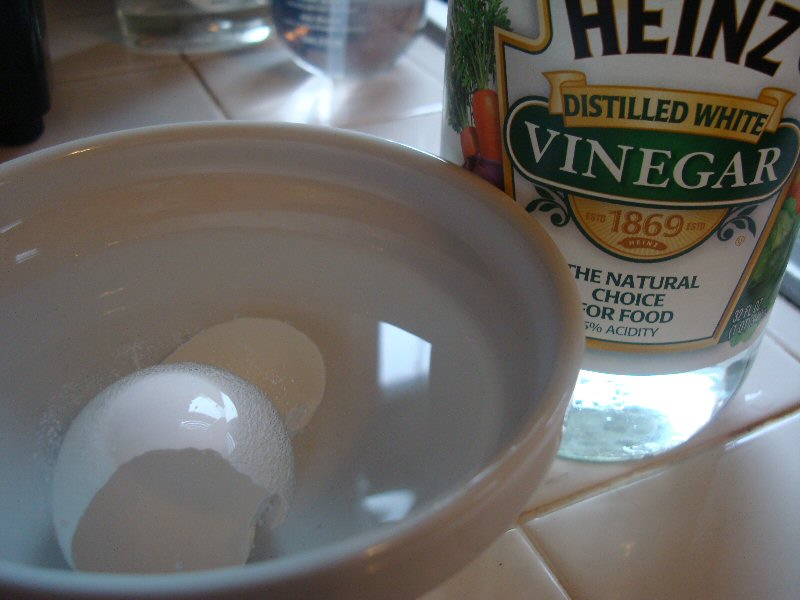
Fill a small bowl with white vinegar. You may as well get a giant bottle of vinegar – you will use a lot. Fill another bowl with tap water. Dunk in as many shells as you can fit in the vinegar. You want them to stay as submerged as possible – turn them if needed.

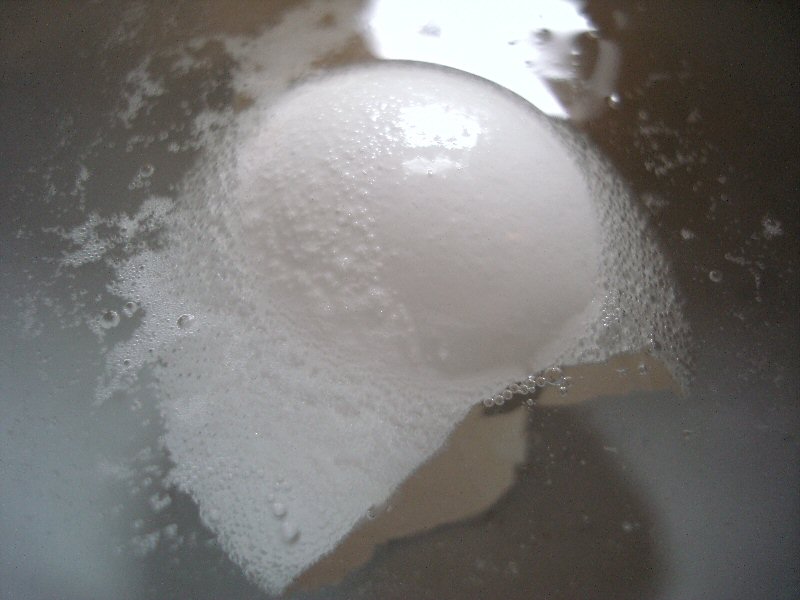
Keep them in the vinegar for five minutes. Don’t keep them in much longer – see the little bubbles in the picture? That is the vinegar reacting with the calcium carbonate in the shell and producing carbon dioxide. Leave them in too long and they will dissolve.

After five minutes the membrane will be rubbery and will have loosened a little from the shell. You should be able to grab an edge of it and carefully peel it away in one or two pieces. If there’s a little left clinging you can gently rub it off with your thumb. The shell is going to be much more brittle now and will probably break. No problem, because you’ll be breaking it later anyway. Don’t worry about salvaging tiny specks of shell, or pieces that the membrane just won’t separate from. There will be more eggs.

Work as fast as you can because there are still shells in the vinegar. As you finish each shell, dunk them in the bowl with the water. After all are finished, give the shells a rinse, gently rubbing off any residual membrane and nasty stuff that may be on the outside of the shell. Leave them on a towel to dry. I store them in a big plastic tub, waiting to be dyed. You’ll want to store white, brown, blue etc. separate.


Saturday, November 28, 2009

A little history

Apparently eggshell mosaics were popular in Renaissance (and slightly earlier) Italy. The artist/biographer Giorgio Vasari mentions eggshell mosaic (musaico di gusci d' uovo) in his Lives of the Artists (Architecture) in 1551. He specifically associates the technique with Gaddo Gaddi, a Florentine painter and mosaicist who lived from 1239-1312 or thereabouts. None of the mosaics seem to have survived.

On his departure from Arezzo, Gaddo went to Pisa, where he made, for a niche in the chapel of the Incoronata in the Duomo, the Ascension of Our Lady into Heaven, where Jesus Christ is awaiting her, with a richly appareled throne for her seat. This work was executed so well and so carefully for the time, that it is in an excellent state of preservation to-day. After this, Gaddo returned to Florence, intending to rest. Accordingly he amused himself in making some small mosaics, some of which are composed of egg-shells, with incredible diligence and patience, and a few of them, which are in the church of S. Giovanni at Florence, may still be seen. It is related that he made two of these for King Robert, but nothing more is known of the matter. This much must suffice for the mosaics of Gaddo Gaddi. - The Lives of the Painters, Sculptors & Architects, Volume 1 by Giorgio Vasari, A. B. Hinds, trans, 1900

Sometime in the 15th century, the painter Cennino Cennini wrote Il Libro dell' Arte, a sort of handbook of Renaissance art methods. He included a short section on creating a "mosaic with crushed eggshells, painted... take your plain white crushed eggshells, and lay them in over the figure which you have drawn; fill in and work as if they were colored... when you have laid in your figure, you set to painting it, section by section, with the regular colors from the little chest... just using a wash of the colors. And then, when it is dry, varnish, just as you varnish the other things on the panel." He's referring to work on glass, but you get the point. He goes on to describe the gilding of crushed eggshells.

It appears that the artists working with eggshell at the time intended to simulate the texture of mosaics and some of the aesthetic by blocking out distinct areas of color. With traditional mosaic, all properties of color, shading, etc. are dependent on selection and placement of available tesserae - the little pieces of stone, glass, tile etc that make up the mosaic. Individual areas of color are distinct and border each other sharply - there is no blending like there might be with paint.

The next reference I could find was in the May 1926 issue of Popular Science, where an artist used them to make decorative objects in the style of seashell encrusted boxes, etc that were popular at the time. Like the Italian masters, she painted her scenes after the eggshells were applied to the surface.


By the 1930’s articles mentioning eggshells appear, peaking in the 60’s and early 70s. So far I haven’t found a definitive “first” use of dyed eggshells for mosaics, but at some point a definite aesthetic emerged. Below is an example that showed up on ebay recently – this is the “classic” look of an eggshell mosaic.


Friday, November 27, 2009

Why eggshell mosaics?

The simple version of these are kid craft - little pieces of Easter egg shell glued onto construction paper. Which is great - the kids enjoy it, learn some new art skills and produce some cool little pictures in the process.

Given a lot of time and patience the result can be much more detailed - scenes represented simply in sharply defined blocks of color, mottled with subtle variations. The results are often more like terrazzo than mosaic.


My son, Henry and the terrazzo Pluto at the Dallas Science Museum.

I'm making a few science-themed pieces and I think the look will be right for it.

There aren't many books on the subject, at least none I've found. There are pages here and there in more general craft and mosaic books, and there is one book in print, Eggshell Mosaics by Gail Dziuba. She doesn't work in exactly the style I will be, but the book did send me in the right direction for materials and technique.

Since the method I'm using was more common in the 1950's - 70's, I've been looking through sources from those decades. There's a little in books, but so far some of the best information has come from newspapers. Some of the materials and methods vary a lot, so I'll be doing some experimenting before committing anything to a final project, posting the results here.

One thing I have found out already - eggshell mosaics have been around a lot longer than I thought.