Showing posts with label EGGS. Show all posts

Monday, January 4, 2010

The Avian Egg

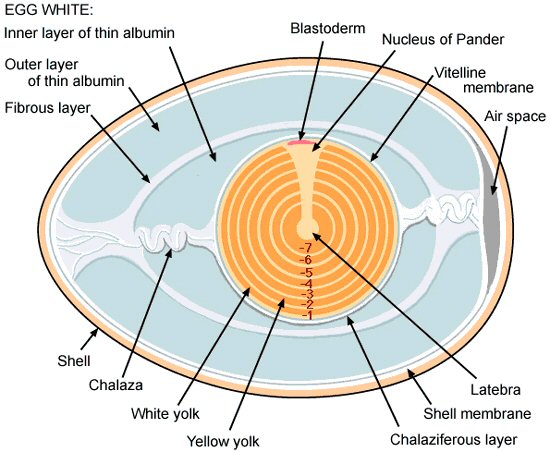
I tracked down a copy of The Avian Egg by Alexis L. Romanoff and Anastasia Romanoff. Alexis Romanoff was a professor of embryology at Cornell and spent much of his career studying eggs. The book is very thorough and still a standard reference despite having been published in 1949. Eggshells (and eggs for that matter) are much more complicated than I imagined.


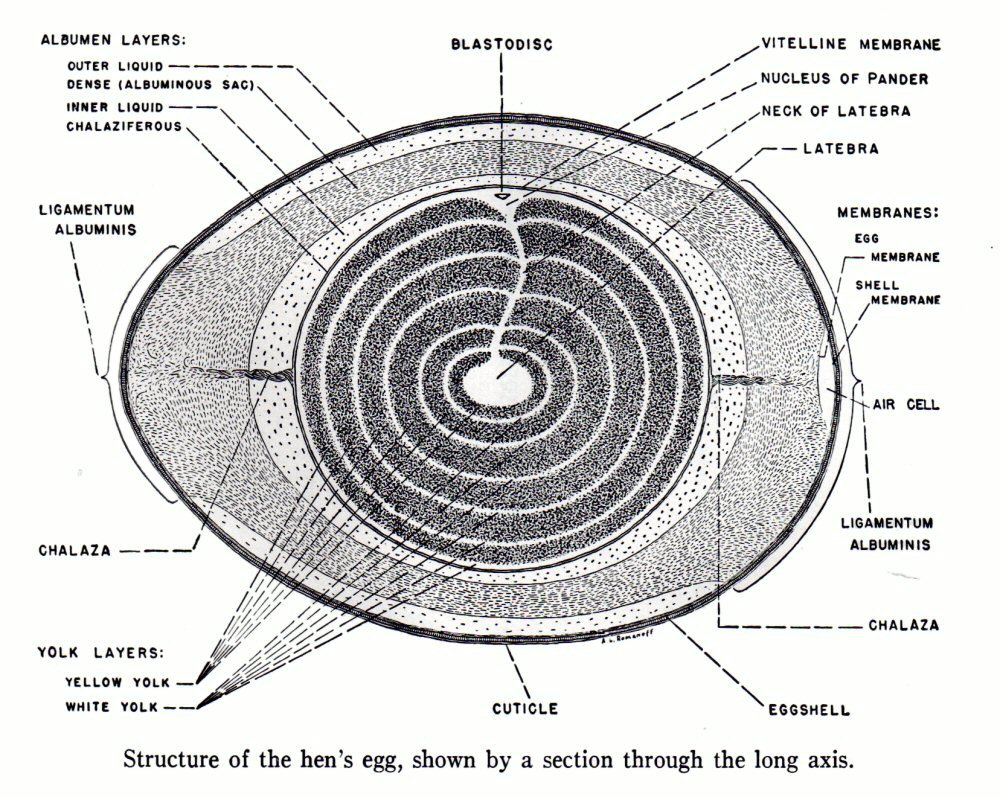
As mentioned before, there are two membranes between the albumen (white) and the shell. Now I know their names: the inner (egg) membrane, membrane putaminis (putamen is Latin for pod or husk), and the outer (shell) membrane, the membrane testae (testa is Latin for shell).

The outer surface of the inner membrane is firmly cemented to the inside of the outer membrane, except in a small area, usually at the blunt end of the egg.

The fibers of the outer surface of the shell membrane are so firmly embedded in the inner surface of the shell that it is difficult to detach the membrane without tearing it.
As for the shell itself:

It is composed of two widely different materials: an organic matrix, or framework, of delicate, interwoven fibers, and an interstitial substance composed of a mixture of inorganic salts. The proportions of these constituents vary in the eggshells of different species of birds. In the shell of the hen’s egg, there is roughly one part of matrix to fifty parts of mineral matter. The organic matrix is a collagen-like protein; the minerals, mainly carbonates and phosphates of calcium and magnesium. Of the latter substance, calcium carbonate is by far the most plentiful. In mineral composition, the eggshell is strikingly similar to limestone.
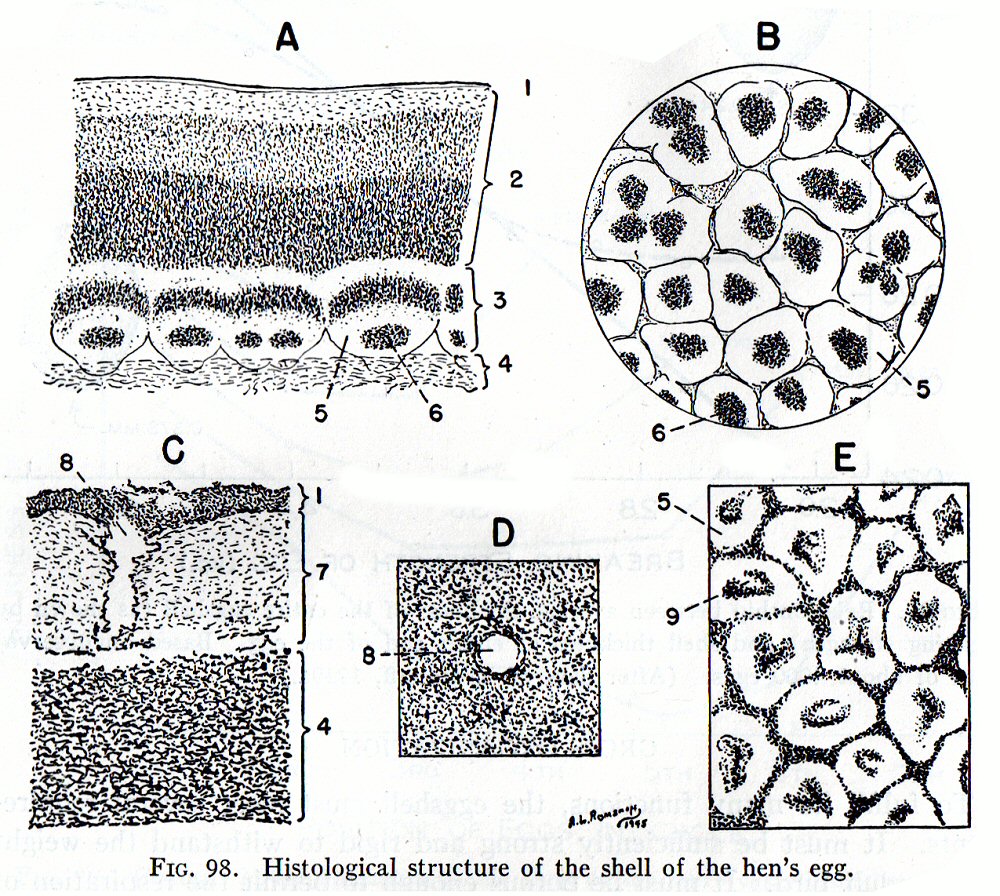
FIG. 98. Histological structure of the shell of the hen's egg.
A, radial section through the shell; magnified about 100 times (after von Nathusius, 1882b). B, tangential section through the mammillary layer of the shell, viewed from the outer surface; magnified about 100 times (after Stewart, 1935). C, radial section through eggshell after decalcification; magnified about 200 times (after Almquist, 1933). D, tangential section through the organic matrix material of the decalcified shell, cutting across a pore; magnified about 200 times (after Almquist, 1933). E, a portion of the inner surface of the shell after removal of the organic material by ashing; magnified about 100 times (after Ferdinandoff, 1931, p. 27).

The numbers indicate: 1, cuticle; 2, spongy layer; 3, mammillary layer; 4, shell membrane; 5, mammilla (mammillary knob); 6, protein matrix material forming the core of the mammilla; 7, protein matrix of shell; 8, pore in the decalcified eggshell; 9, space in a mammilla remaining after the organic core has been removed by burning.

The shell has two main layers – the mammillary and the spongy layers. The mammillary layer is the smaller, and is partially embedded in the outer surface of the shell membrane. For most birds, the spongy layer is the larger part of the shell. The whole thing is covered with pores for respiration. Firmly cemented to the outside of the shell is the cuticle, a very thin layer chemically similar to the membranes.

And as for the colors:
The colors of birds' eggshells are due to two major pigments, red-brown and blue-green, which were first identified with the bile pigments — the brown with bilirubin, and the green with biliverdin (Wicke, 1858). The shell pigments are now considered to be more closely related to the hemoglobin of the blood than are the bile pigments.

The red-brown pigment of the eggshell has been named oöporphyrin (Fischer and Kögl, 1923, 1924; Fischer and Müller, 1925; Bierry and Gouzon, 1939). This pigment may easily be converted into hematoporphyrin, which shows a red luminescence in ultraviolet light, of wave length of 3660 angstrom units, generated by a quartz-mercury lamp (Hulsebosch, 1927). Hematoporphyrin is probably related t hematin, which is a decomposition product of the hemoglobin of the blood.

The brown eggshells of the domestic fowl are rich in oöporphyrin. According to Voelker (1940), oöporphyrin is present in the shell of whit eggs (at least those of the chicken, duck, goose, pigeon, and owl) when they are laid, but it is quickly destroyed by light. Oöporphyrin was also found in the eggshells of many other species, including a number of passerine birds.

The blue-green pigment of some highly colored eggshells was named oöcyan by Sorby (1875). The chemical properties of this pigment indicate that it is a substance containing three pyrrole rings (Lemberg, 1931). According to Tixier (1945), the green pigment of the emu egg is the methyl ester of biliverdin IXa.
Now you know. How the colors are distributed (evenly across the surface, in spots or splotches) depends on where in the shell formation process the egg is when the pigments are deposited.

Being a thorough book, there is also a section on artistic uses of eggs and eggshells. The author includes the following paragraph and illustration:

Eggshell Mosaics.
The production of mosaics, by inlaying small pieces of glass, tile, enamel, or a variety of other substances, is an ancient craft that has frequently reached a high degree of artistry. It is also practiced as a hobby. Among the materials that have been used for this purpose is colored eggshell, which has been found adaptable for making many novel designs (Fig. 422). The shells are broken into pieces from 1/8 to ¼ inch in diameter, dyed, and glued to a base in the desired arrangement.

Sunday, December 13, 2009

An egg is an egg is an egg...

After reading the 1957 American Home article, I started thinking about different colors of eggs that would have been available then, and how cool it would be to make a mosaic using only the original colors of the eggshells.

Most commercial egg layers are leghorns, and they lay white eggs. But there are a lot of small farms raising less common breeds, and their eggs are all sorts of colors – blue, green, red, brown – and a lot of these eggs are making their ways to farmers markets, co-ops, etc. These eggs are well worth looking for, because not only are they all sorts of interesting colors, they are often from organically raised, free-range chickens. With urban farming on the rise, I wouldn’t be surprised if there are actually more varieties of eggs available now than in 1957.

Check out Henderson's Handy-Dandy Chicken Chart for a good idea of what’s out there. Granted some of these are pretty rare breeds, but someone in your area may be raising Ameraucanas (blue, green, pink), Marans (chocolate brown), Rhode Islands (brown), or Silkies (cream). Make friends with these folks!
 
Also keep an eye out for other non-chicken eggs - guinea hen and turkey eggs are speckled, for example. Try an image search for a few of these ("Marans eggs", for example) - the variety is impressive.

Saturday, December 12, 2009

We believe that you can please the most discriminating friend


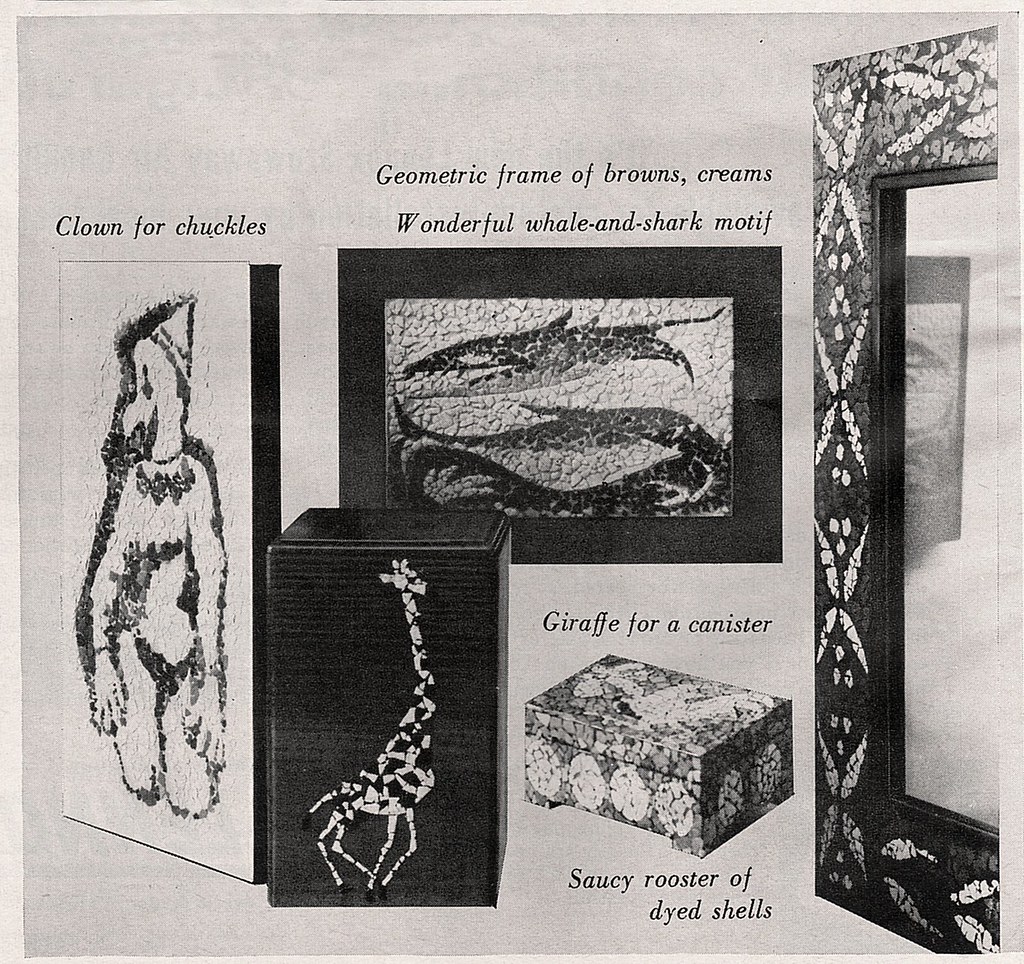
Here’s a real find – a gem of an eggshell article from the June 1957 issue of American Home. The magazine itself is a treasure trove of blissful, mid century domestic kitsch, as well as several really bizarre advertisements.

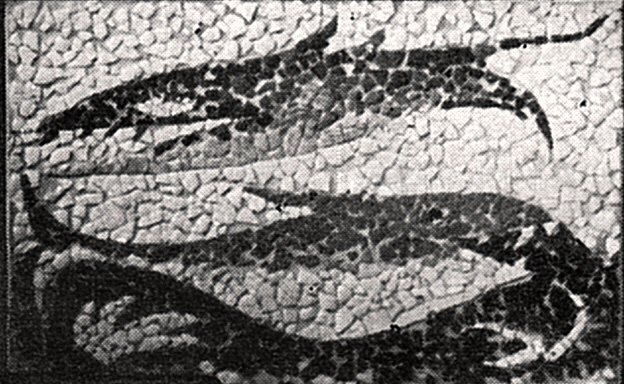
The article advocates using the natural range of colors of eggs - it is assumed that more of a variety was readily available in 1957 - and using vegetable dye for special colors. I really like the idea of using natural "flat white, ivory, pale honey, beige, warm brown, even some mottled shells". I’m not sure what qualified as vegetable dye in 1957, but today it usually refers to dyes made from vegetable sources. The article may be referring to something closer to food coloring (or something more sinister), but I’m not sure.

I really like the whale and shark...


The Egg and You
Ray Abel

Broken eggshells make beautiful mosaics! Eggshells have a surprisingly wide range of subtle colors—flat white, ivory, pale honey, beige, warm brown, even some mottled shells. If you want a still wider range of colors for your mosaics, use vegetable color dyes on some of the shells. Then they're as versatile as an artist's palette. Making eggshell mosaics is great fun, and you can decorate pieces to get results comparable to beautiful boxes, canisters and such that you'll see in exclusive gift shops.


Once you get started, you'll think of many ways to use this fascinating, inexpensive technique. And we believe that you can please the most discriminating friend if you choose your subjects wisely. An eggshell-mosaic box is a delightful gift idea, because your present won't be duplicated.

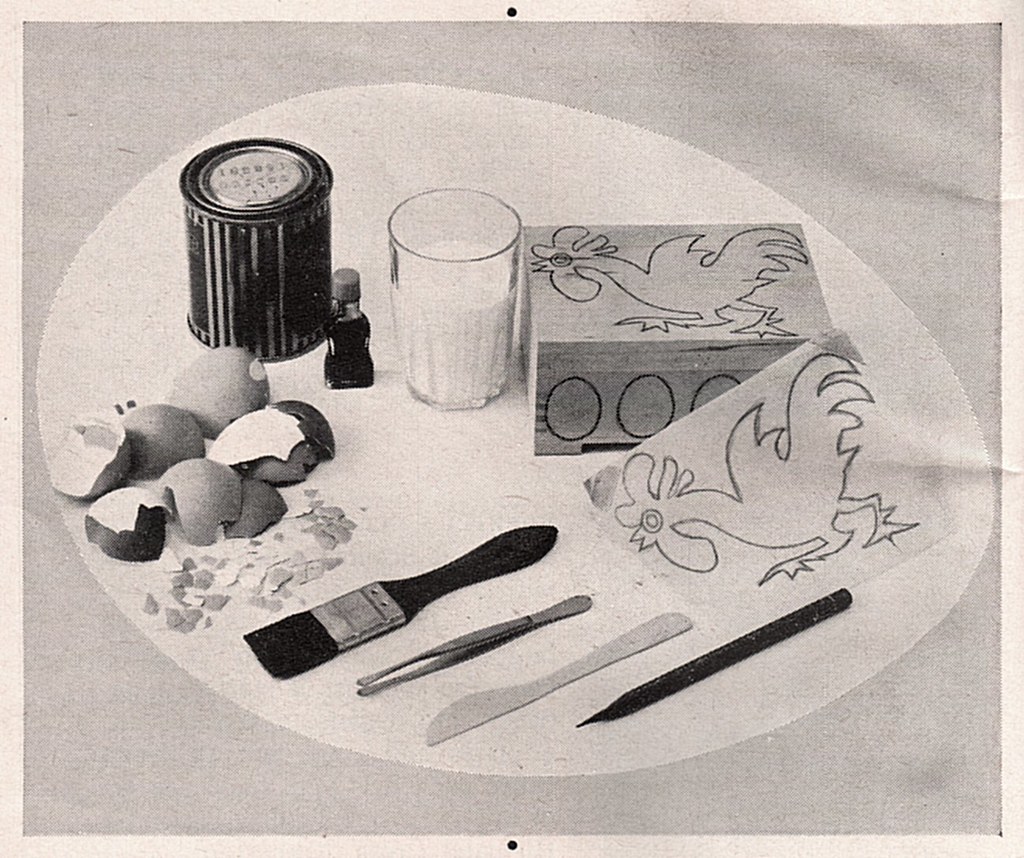
All you need to make the attractive decorative accessories shown on page 42 are some eggshells, vegetable color dyes, a pair of tweezers, adhesive, and shellac, varnish or clear plastic fixative spray—and. of course, the item you want to decorate. Since you probably have many of these things on hand, the cost of the decorating materials turns out to be practically nil!


With a bold rooster motif done in eggshell mosaic, a plain wooden box can become a thing of beauty, to be displayed with pride. Trim a mirror with deep brown and cream-colored eggshells in a diamond-like pattern, and it becomes an elegant piece. Let the sea inspire a handsome picture featuring a modern design of whales and sharks—rounded motifs that lend themselves beautifully to this medium. And you might decide to decorate a tall wooden box or a kitchen canister with a clown or a funny giraffe for a touch of humor. The possibilities are limitless!


In any case, trace your motif from a favorite picture—from a book, perhaps, or a greeting card or newspaper—and trace just the outline. Break eggshells into small pieces of various shapes. If you want to use special colors, dip piece of shell in warm vegetable color dye. Use tweezers for this. Dry colored shells before you proceed. Now see the step-by-step how-to pictures on page 42.

Here, step-by-step, is the way you decorate gifts with eggshell mosaics


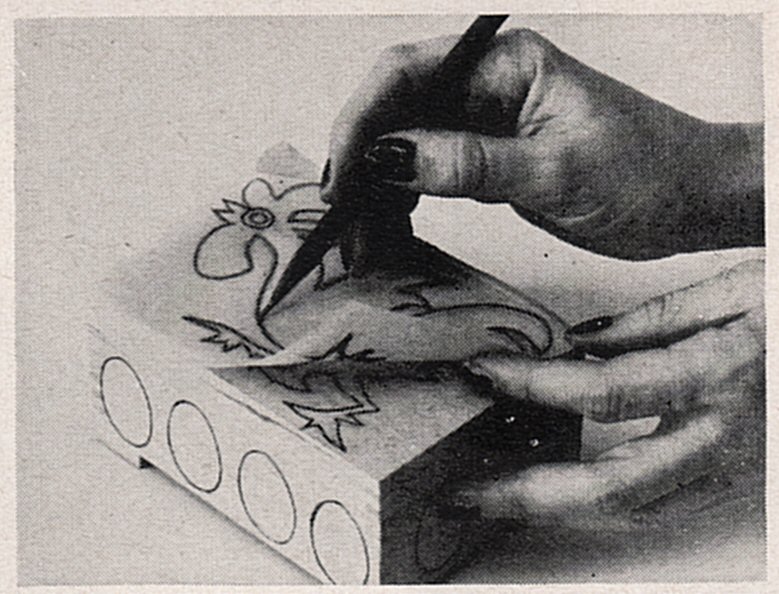
First trace design you wish to reproduce onto tracing paper. Then blacken other side of paper with a pencil—or place a piece of carbon paper under tracing. Hold tracing on article (tape is easiest way) and trace design on to object.


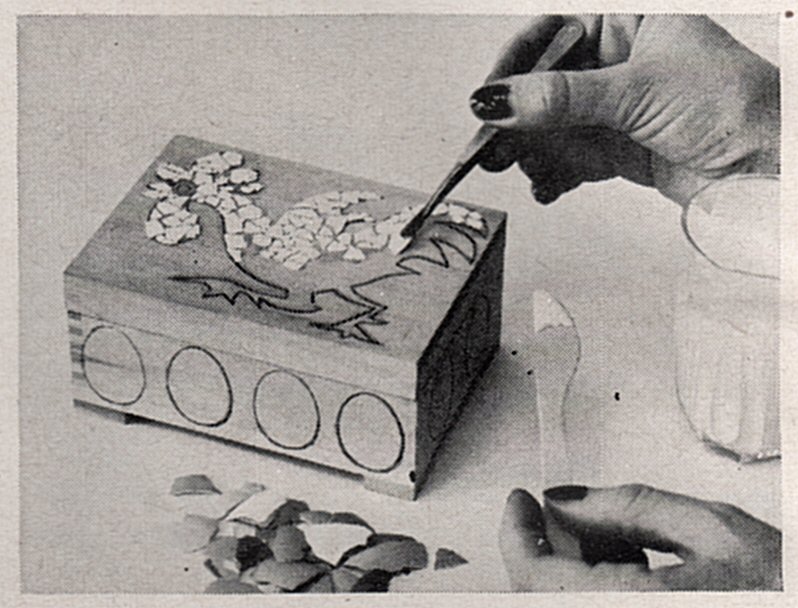
Plan colors you will use before you start. If you want to dye shell, dip into warm vegetable color dye, holding with tweezers. Brush a coat of adhesive—the kind that dries transparent— on back of piece of eggshell and place on box with tweezers. Fill in picture, then background.

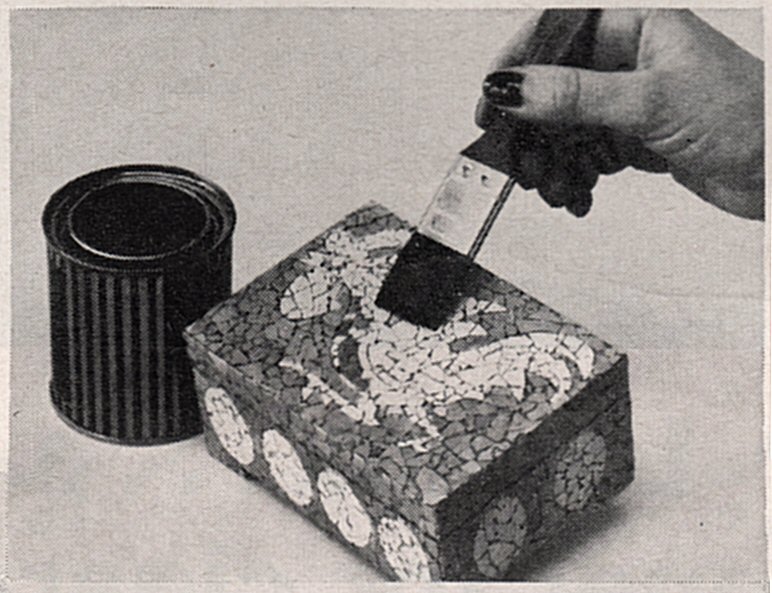
Use shell pieces of contrasting colors to fill in the background of the article so design will be clearly outlined. When the adhesive is fully dry (at least 24 hours after the final piece of shell is placed) brush over entire piece with clear shellac or varnish. Or use plastic spray.


THE AMERICAN HOME, JUNE, 1957


Some notes on eggshells, continued

A few posts back I suggested briefly soaking shells in vinegar to loosen the membranes. After experimentation I’ve changed my mind and method.


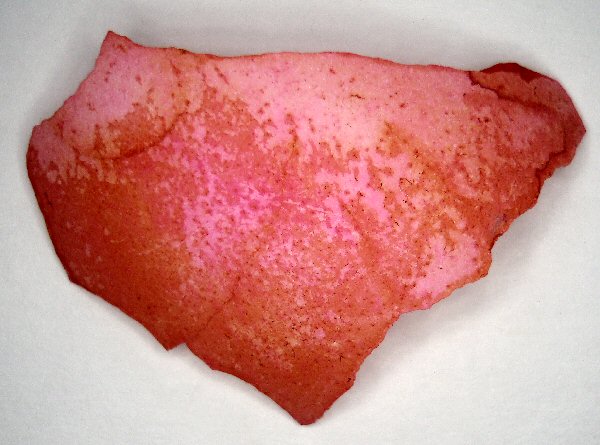
The shells do get pitted from the acid, which becomes apparent after they are dyed. This picture shows the results – the uneven patches of color show where the vinegar has eaten a little deeper. The dye - red food color, water and vinegar - is a little acidic so it probably contributes to the pitting as well. If this is the effect you want, then this is how to get it. I’m looking for a smoother surface, so I’ll be skipping the vinegar bath.
As it turns out, warm water works nearly as well. After soaking for five minutes, the inner membrane peeled out with no problem, easier than it would have if fresh (these shells had been sitting around for a while). The result is a shell with more even color and a smoother surface.

Later soaking in acidic dye baths should kill any bugs that may still be clinging, but you can add a few drops of bleach to the water bath if you feel better about it. Watch it closely though because bleach can damage eggshells if too concentrated.
The thinner outer membrane, which is firmly attached to the shell, doesn’t come out so easily, but it didn’t with the vinegar either. You can rub it out with your thumb, but this tends to cause the shell to crumble. I will be trying a few mosaics with this thinner membrane left in. Hopefully it is thin enough and firmly enough attached that the glue will still bond with the shell itself. I may learn otherwise – stay tuned.

Sunday, November 29, 2009

Some notes on eggshells

The eggshells I am using are common grocery store variety hen eggs. White is recommended because it is easier to predict how dyes will work with them. Don’t throw out your brown eggs, though – the nice reddish brown tones may be just what you need for a project, and they are good to have if you are using vegetable or food dyes (more about that later). And if you are lucky enough to know someone who raises chickens that produce blue or green eggs, you should ask them to save shells for you as well.

You will need a lot of shells. Get your friends to save them for you. Tell them to just give them a rinse, and that it doesn’t matter if they are in little pieces - they’re going to wind up that way anyway.

Keep in mind that eggshells may have a few Salmonella bacterium hitching a ride. Washing (and the upcoming vinegar bath) should take care of any that are lingering, but it is wise to take precautions – keep hands and workspace clean between working with unwashed eggshells.


Eggs are complicated things. The shell itself is mostly calcium carbonate, held in a matrix of proteins. Attached to the shell is the shell membrane, which is actually two layers separated at the blunt end by an air space. The membrane will need to be removed so that the shell itself can be glued directly on the mosaic support; otherwise, as the membrane dries and separates from the shell, the shell pieces may pop off. When the egg is freshly cracked, it is fairly easy to remove the membrane. However, it’s a little easier to wait.


UPDATE - I no longer recommend the vinegar pre-soak. Find out why here...


If people are saving shells for you, you’ll probably end up cleaning a bunch that have been sitting around for a while and have dried out. The membrane will be very brittle and almost impossible to remove. But don’t lose hope – there is a solution.
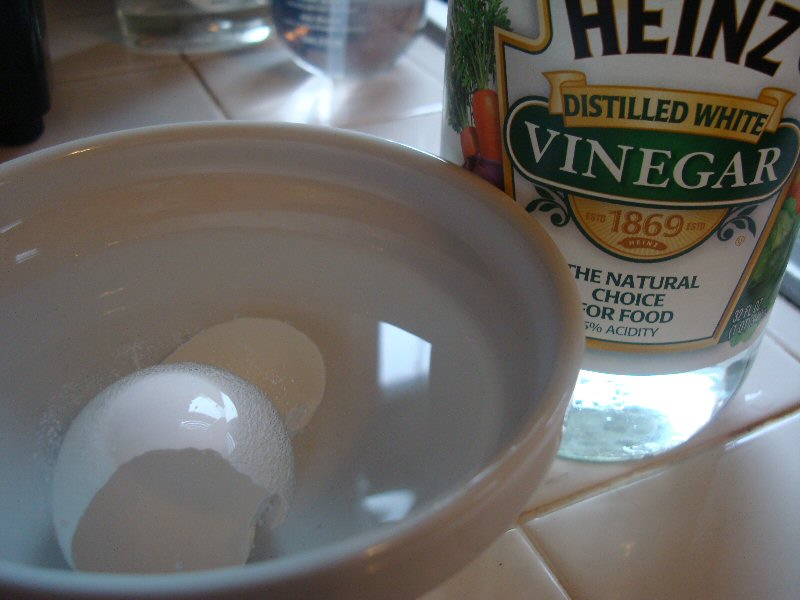
Fill a small bowl with white vinegar. You may as well get a giant bottle of vinegar – you will use a lot. Fill another bowl with tap water. Dunk in as many shells as you can fit in the vinegar. You want them to stay as submerged as possible – turn them if needed.

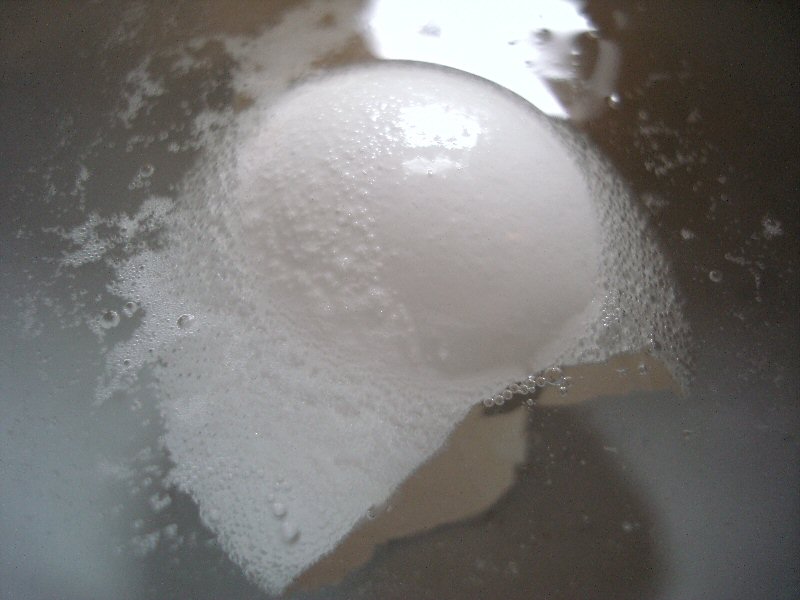
Keep them in the vinegar for five minutes. Don’t keep them in much longer – see the little bubbles in the picture? That is the vinegar reacting with the calcium carbonate in the shell and producing carbon dioxide. Leave them in too long and they will dissolve.

After five minutes the membrane will be rubbery and will have loosened a little from the shell. You should be able to grab an edge of it and carefully peel it away in one or two pieces. If there’s a little left clinging you can gently rub it off with your thumb. The shell is going to be much more brittle now and will probably break. No problem, because you’ll be breaking it later anyway. Don’t worry about salvaging tiny specks of shell, or pieces that the membrane just won’t separate from. There will be more eggs.

Work as fast as you can because there are still shells in the vinegar. As you finish each shell, dunk them in the bowl with the water. After all are finished, give the shells a rinse, gently rubbing off any residual membrane and nasty stuff that may be on the outside of the shell. Leave them on a towel to dry. I store them in a big plastic tub, waiting to be dyed. You’ll want to store white, brown, blue etc. separate.